
This is the second and final part of my series of posts to configure TKG with OIDC using Okta. In the previous post, we have seen how to configure VMware Tanzu Kubernetes Grid to use OIDC using Okta. We were able to successfully configure TKG User Authentication using OIDC with Gangway, Dex & Okta. However, we only saw how to use a username to configure RBAC in Kubernetes cluster, this may not be an ideal solution, you may want to provide access to a group instead of individual users.
In this post, we are going to see how to modify the configuration of Okta, Dex, and Gangway to allow us to use groups in TKG Workload Cluster for RBAC.
Before you begin
- I am using Mac to run the below commands, you may need to change some if you are using Windows especially.
- We are using TKG v1.1
- tkg cli v1.1 downloaded and configured
- TKG management & workload clusters up and running with integration to Dex, Gangway, and Okta. See my previous post.
Let us get going…
There are multiple steps in enabling groups access
- Modify Gangway configuration to request for groups scope
- Configure Dex to request for additional groups scope
- Configure Okta to provide groups in claims
- Create RBAC Authorization to groups in TKG Workload Cluster
Step 1: Modify Gangway configuration
In this step, we need to enable groups scope in Gangway configuration, so that gangway requests for groups from Dex/Idp.
1. Modify the Gangway Config Map
Open the gangway Config Map manifest in text editor (tkg-extensions-v1.1.0/authentication/gangway/aws/03-config.yaml).
Go to the scopes property by searching scopes:.
The default configuration looks like below![]()
Add groups in to the scopes array, the final output looks like below
    # Used to specify the scope of the requested Oauth authorization.
    scopes: ["openid", "profile", "email", "offline_access", "groups"]
Set your kubectl context to your workload cluster. Apply the changes to configmap.
kubectl config current-context
kubectl config use-context <workload-cluster-context-name>
kubectl apply -f tkg-extensions-v1.1.0/authentication/gangway/aws/03-config.yaml
2. Force the Gangway to use updated configuration
To reflect the changes we made to ConfigMap, delete the currently running gangway pod, so the gangway deployment will start a new pod and which picks up new changes in configmap.
kubectl get pods -n tanzu-system-auth
Get the gangway pod name from and delete the pod
kubectl delete pod gangway-565599c4b6-xya3s -n tanzu-system-auth
Ensure the new gangway pod came up
kubectl get pods -n tanzu-system-auth
Step 2: Configure Dex
In this step we will configure Dex to allow groups scope to be used.
1. Modify the Dex config map
Open the dex configmap file in text editor. (tkg-extensions-v1.1.0/authentication/dex/aws/oidc/04-cm.yaml).
Search for scopes:, the default value looks like below

Enable the scopes section, which includes groups as well.
        # Full list at https://github.com/dexidp/dex/blob/master/Documentation/custom-scopes-claims-clients.md
        scopes:
          - profile
          - email
          - groups
Search for getUserInfo: and enable the property.
Default configuration looks like below

Enable the getUserInfo flag.
        # https://openid.net/specs/openid-connect-core-1_0.html#UserInfo
        getUserInfo: true
Search for insecureEnableGroups: and enable the property.
        # Groups claims (like the rest of oidc claims through dex) only refresh when the id token is refreshed
        # meaning the regular refresh flow doesn't update the groups claim. As such by default the oidc connector
        # doesn't allow groups claims. If you are okay with having potentially stale group claims you can use
        # this option to enable groups claims through the oidc connector on a per-connector basis.
        # This can be overridden with the below option
        insecureEnableGroups: true
The modified sections will look like
...
        # List of additional scopes to request in token response
        # Default is profile and email
        # Full list at https://github.com/dexidp/dex/blob/master/Documentation/custom-scopes-claims-clients.md
        scopes:
          - profile
          - email
          - groups

...
        # Groups claims (like the rest of oidc claims through dex) only refresh when the id token is refreshed
        # meaning the regular refresh flow doesn't update the groups claim. As such by default the oidc connector
        # doesn't allow groups claims. If you are okay with having potentially stale group claims you can use
        # this option to enable groups claims through the oidc connector on a per-connector basis.
        # This can be overridden with the below option
        insecureEnableGroups: true
...
        # When enabled, the OpenID Connector will query the UserInfo endpoint for additional claims. UserInfo claims
        # take priority over claims returned by the IDToken. This option should be used when the IDToken doesn't contain
        # all the claims requested.
        # https://openid.net/specs/openid-connect-core-1_0.html#UserInfo
        getUserInfo: true
...
Set your kubectl context to Management cluster, and apply changes to dex configmap.
kubectl config current-context
kubectl config use-context <mgmt-cluster-context-name>
kubectl apply -f tkg-extensions-v1.1.0/authentication/dex/aws/oidc/04-cm.yaml
2. Force Dex to use updated configuration
Delete the running Dex pod to force to take the latest configuration into effect.
kubectl get pods --namespace tanzu-system-auth
The pods list may look like this, copy the pod name

Run the below command with the dex pod name (Replace it with your pod name).
kubectl delete pod dex-565599c4b6-w99wn -n tanzu-system-auth
Ensure a new pod came up
kubectl get pods -n tanzu-system-auth
Step 3: Configure Okta
In the previous post, we have used okta admin account to login and gain access to workload cluster. Now we would like to create some group(s), users and associate them. And try to use a user of the group to gain access to cluster.
1. Create Users, Groups and associate them to application
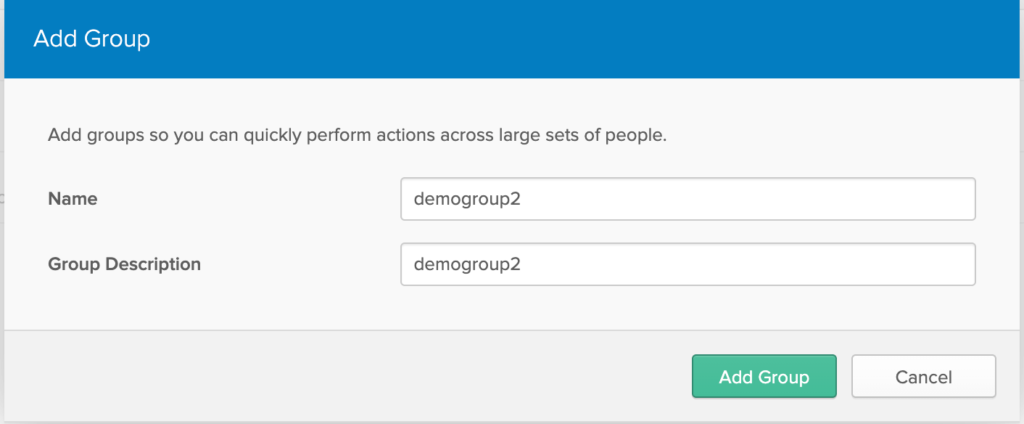
Create a Group
Login to Okta developer account, In Menu, Goto Users -> Groups -> Click on ‘Add Group’, enter a group name and description.
Create a User
In Menu, Goto Users -> People -> Click on ‘Add Person’
- Enter required details
- Select group as previously created group name (ex:
demogroup2) - Change Password option to ‘Set by admin’ and provide a secure password.
- Uncheck ‘User must change password on first login’ option. Click Save.

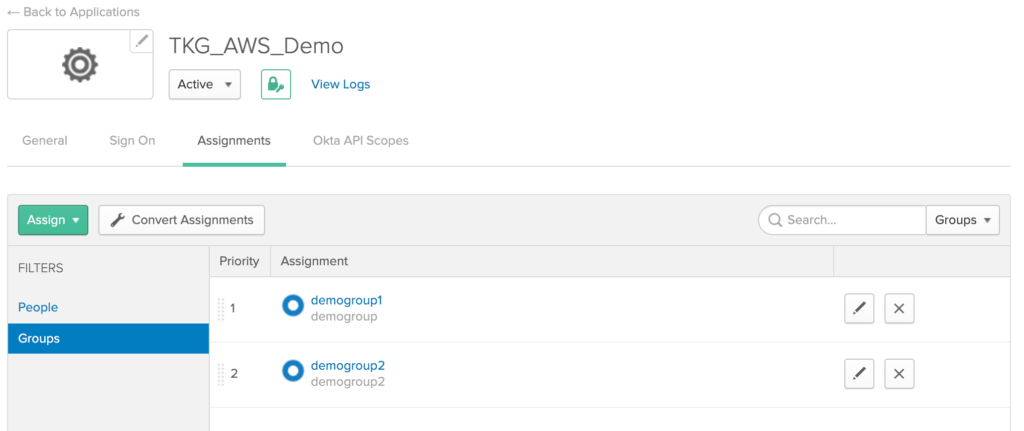
Assign Group to Our Application
In Menu, Goto Applications-> Select your Application -> Under Assignments tab, click on drop down next to ‘Assign’ button, Select ‘Assign to Groups’.
Under the list of groups, Click on ‘Assign’ button next to your newly created group. Click Done.
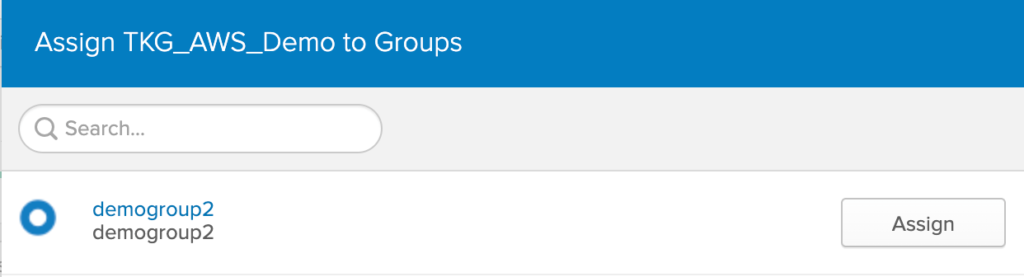
By Default, ‘Everyone’ group is assigned to the application, you may remove by clicking on ‘X’ mark, however, this is optional.
2. Enable Groups filter
In Okta Developer account, change the UI to Classical UI by following steps
- Above the menu bar, find
Developer Consoleand click on the drop-down next to it, selectClassical UI.

In the Menu, Goto ‘Applications’ -> ‘Sign On’ tab -> Click ‘Edit’ on OpenID Connect ID Token section.
SelectGroups claim type as Filter.
Under Groups claim filter, select Starts With as condition and value as demo. (As our example group name is demogroup2)
Click ‘Save’.
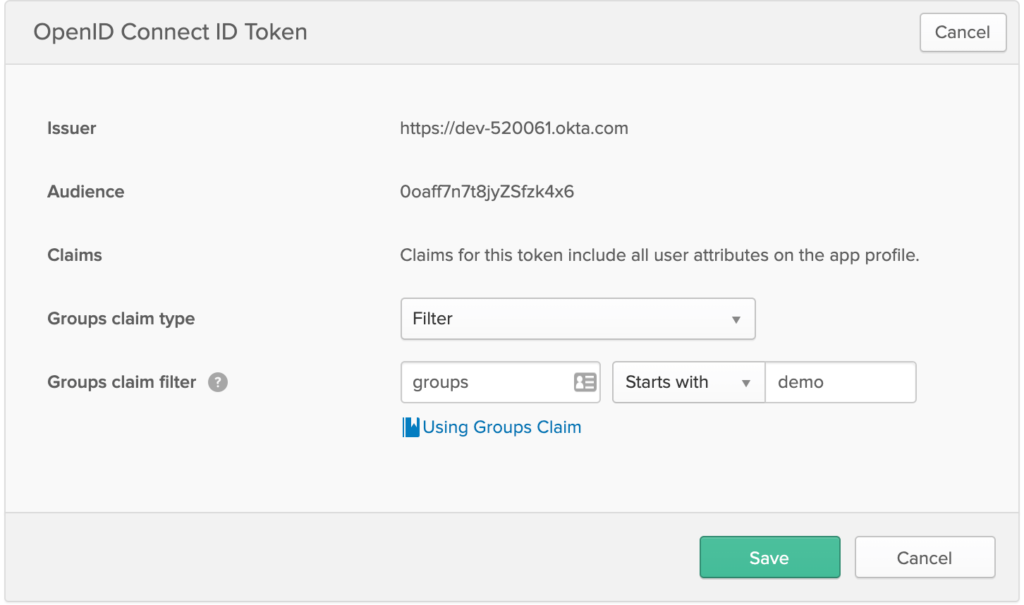
Note: You may use other filters as per your requirement.
Step 4: Create RBAC Authorization to groups in TKG Workload Cluster
1. Create Cluster Role Binding
We need to create Cluster Role Binding/Role Binding as per our requirement. Here i am creating Cluster Role Binding with default Cluster Role cluster-admin.
Create the manifest file with name cluster-group-rbac.yaml. Provide your group name.
kind: ClusterRoleBinding
apiVersion: rbac.authorization.k8s.io/v1
metadata:
  name: okta-group-access-binding
subjects:
  - kind: Group
    name: demogroup2
    apiGroup: rbac.authorization.k8s.io
roleRef:
  kind: ClusterRole #this must be Role or ClusterRole
  name: cluster-admin # this must match the name of the Role or ClusterRole you wish to bind to
  apiGroup: rbac.authorization.k8s.io
Set your kubectl context to TKG Workload cluster with admin user context.
Run the below to apply Cluster Role Binding
kubectl apply -f cluster-user-rbac.yaml
We have enabled group access in gangway, dex and Okta. Created Cluster Role binding for the group to give necessary permissions to access the cluster objects.
So, now it is time for testing the access.
2. Get the Kube config
Open the browser and access the gangway url. Ex: https://gangway.helium.k8scloud.cf
You might have to accept the browser warning as we are using self-signed certs.
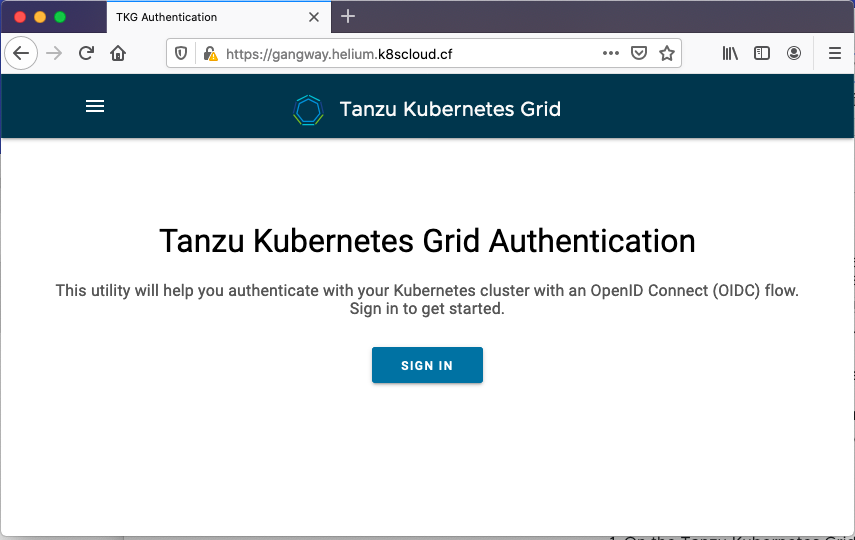
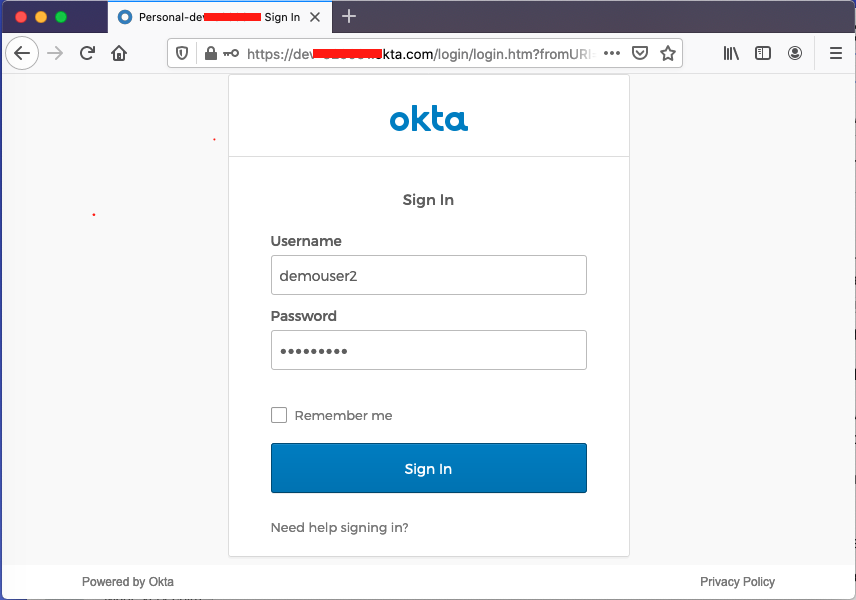
Click on SIGN IN, this will redirect url to dex, then to okta login page.
Use the user you have created above which is associated to the group to login.
Note: I made some modifications to my okta profile to allow username as a simple string instead of email. But for you, may have to use email as username.
Once the login and token generation is successful, you will see below screen.
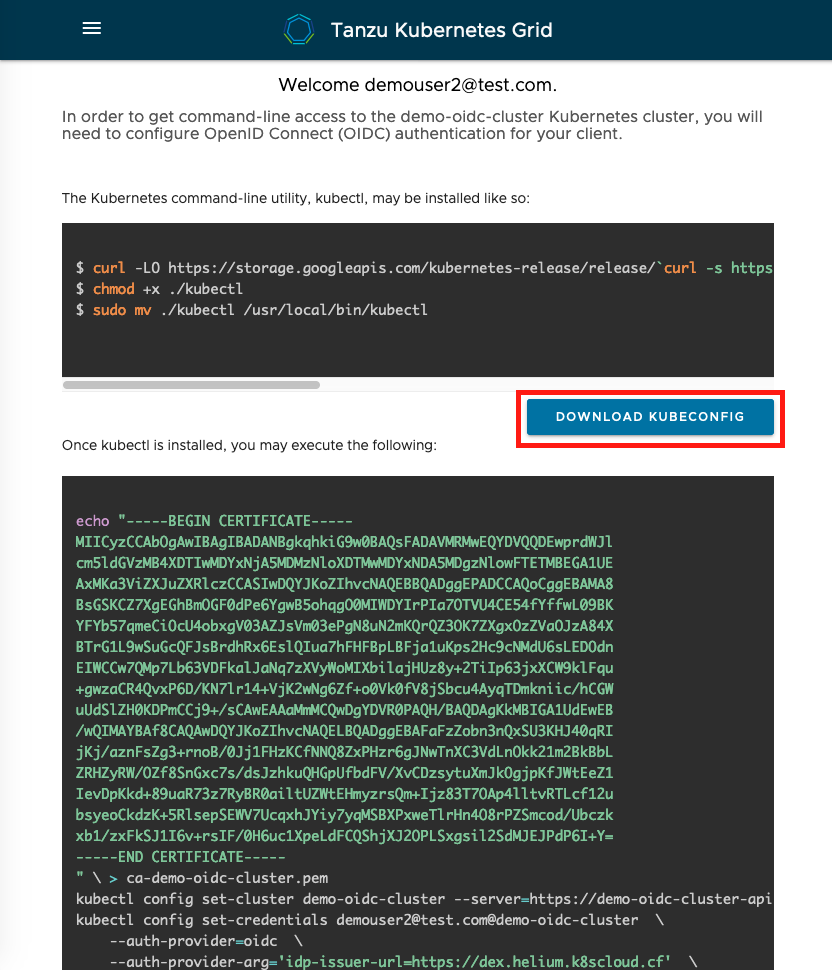
Click on DOWNLOAD KUBECONFIG to download the kubeconf for the cluster.
3. Verify access to Cluster
Copy the downloaded kubeconf file to working directory.
Open a new terminal, and navigate to your workind directory, set KUBECONFIG=kubeconf. Run the below command to get the list of pods in the default namespaceShell
kubectl get pods
You should be able to list the pods.
Conclusion
We looked at configuring TKG with Dex, Gangway for OIDC, and ID Provider as Okta. We enabled user based access and group based access to the clusters. This concludes the 2 part series of Configuring TKG for OIDC with Okta.
References
- VMware Tanzu Kubernetes Grid Official documentation
- https://github.com/dexidp/dex
- https://github.com/heptiolabs/gangway
- https://developer.okta.com/docs/guides/customize-tokens-returned-from-okta/add-groups-claim-org-as/
- https://openid.net/specs/openid-connect-core-1_0.html#UserInfo
- https://openid.net/specs/openid-connect-core-1_0.html#ScopeClaims